Wednesday, December 19, 2012

Birthday Hat


What you need:

card stock paper
tape
glue
hole puncher
stapler
scissors
elastic string
things to decorate hat with (stickers, markers, etc.)


Steps:
1. Print out party hat template from this site onto card stock paper. http://www.firstpalette.com/tool_box/printables/Birthdayhat.html
2. Cut out template.
4. Cut the slit along the line on the hat's side.
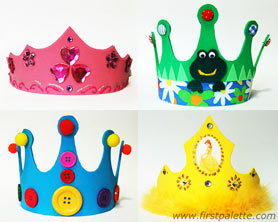
5. Decorate hat.
Optional step: attach bows, ribbons, etc. to the top of the hat
6. Make a small cut on bottom corners of hat's side flap.
7. Insert flap into slit and tape the flap inside the hat.
8. Staple bottom of hat.
9. Punch two holes on bottom of hat.
10. Insert elastic string through holes.
11. Tie string so it fits to head.


* http://www.firstpalette.com/Craft_themes/Wearables/Birthday_Hat/Birthday_Hat.html


Crown

What you need:
1 card stock paper
1 hole puncher
1 elastic band
glue
scissors
items to decorate crown with (markers, fabric, glitter, buttons, etc.)

Steps:
1. Go on this website for crown templates. http://www.firstpalette.com/tool_box/printables/princesscrown.html
2. Print out the crown template on card stock paper.
3. Colour/design the crown.
4. Cut out the crown.
5. Punch out holes on the left and right sides of the crown.
6. Cut an elastic band so it's 10" to 12".
7. Put the elastic band through the holes of the crown.
8. Knot each end of the elastic band.
9. Fit the crown to head by adjusting the length of the elastic band.


http://www.firstpalette.com/Craft_themes/Wearables/craftfoamcrown/craftfoamcrown.html

Party Blower


What you need:
1 drinking straw
1 decorative paper
tape
glue

Steps:
1. Cut decorative paper into strips that are 2"x9".
2. Lightly fold strip into half (hot dog style).
3. Fold strip so the ends meet where you lightly creased (hot dog style).
4. Tape where the two ends meet (the whole length).
5. Fold one end of the strip into a very small rectangle.
6. Keep folding around the small rectangle a couple times and tape/glue it shut.
7. Tightly roll strip around a pen.
8. On the open end of the strip, insert the straw and fold the corners of the strip around it.
9. Tape the strip to the straw.


* http://www.utterlyengaged.com/category/issues/issue-004/page/51/

Hello Kitty Bag

What you need:
1 paper bag (preferably white)
black paper
yellow paper
white paper
pink paper
glue
scissors

Steps:
1. Cut out 2 medium sized circles (eyes) and 1 oval from the black paper (nose).
2. Cut out 1 smaller oval from the yellow paper (nose).
3. Glue the yellow oval to the black oval.
4. Cut out 6 lines from the black paper (whiskers).
5. Cut out 2 big rounded triangles from the white paper (ears).
6. Glue the eyes, whiskers, nose, and ears to the paper bag.
7. Cut out 2 medium sized triangles from the pink paper (bow).
8. Glue the bow to Hello Kitty's ear so it looks like |><|.
9. Cut out a piece of the pink paper and crumple it up into a small ball.
10. Glue the ball in between the 2 pink triangles so it looks like |>•<|.


* http://leukelintjes.blogspot.com/2011/07/traktatiezakjes-hello-kitty.html

Snowman


What you need:
white paint or white paper
1 small sanded block of wood
black sharpie
colourful fabric
glue

Steps:
1. Paint the wood white. Or cover the wood in white paper and glue it.
2. Draw two dots with sharpie to make eyes.
3. Tie colourful fabric around wood and glue it.

* http://blog.makezine.com/craft/how-to_wooden_snowmen/

cheese (original)

What you need:
1 yellow coloured foam
1 orange coloured foam
glue
2 different sized hole punchers

Steps:
1. Cut out the orange and yellow coloured foams into rectangles.
2. Punch out random holes in each foam.
3. Glue the two foam pieces together.

smores (original)

What you need:
1 cotton ball
1 light brown coloured foam
1 dark brown coloured foam
glue

Steps:

1. Cut out 2 squares from the light brown foam.
2. Cut out 4 or 5 squares from the dark brown foam.
3. Glue the dark brown squares together.
4. Glue one light brown square to the stack of dark brown squares.
5. Glue the cotton ball on top.
6. Glue the other light brown square on top of the cotton ball.

fairy jar (original)

What you need:
1 Empty jar
Glow-in-the-dark paint (can use as many colours as needed)
Brushes or anything that can be used as a brush

1. Put the glow paint on the bottom of the jar first. 
2. Then put it around the inside jar. 
3. Let it sit in the sun to enhance and dry the glow paint.


* If you find that your jar doesn't glow very well, just add a second coat. It's about the small dots that are thick with paint.

pumpkin (original)

What you need:
1 Orange paper
1 Black paper
2 green cotton balls, a green feather, or a green ribbon, or a green pipe-cleaner 
Tape
Scissors
Pen or marker 
Glue

1. Fold orange paper in half 3 times. 

2. Unfold paper. Cut paper along lines just made. (4 extra strips can use for another pumpkin.)

3. Fold strips lightly in half and mark center.

4. Put tape on a strip so it's double sided. 

5. Put another strip on to make a cross. 


6. Do this two times.

7. On one of the crosses put tape and then put the other cross on top. 

8. Tape strips together.

9. Cut eyes and mouth out of black paper.

10. Tape or glue green ribbon on.

sheep (original)


what you need:
1 bottle cap
white paint
1 black construction paper
2 small googly eyes
1 small pink cotton ball
scissors
glue

1. paint bottle cap white
2. cut 1 big triangle and 2 smaller triangles (head and ears of sheep)
3. glue to bottle cap
4. glue 2 eyes and cotton ball onto black paper